This chapter will get you familiar with the MicroBiz Main Menu (the "blue screen").
This is the first screen that you will encounter once MicroBiz has successfully opened. It has the following menu options:
File
Register
Management
Inventory
Reports
Customers
Tools
- Help
Clicking on any of the menu options presents a “drop-down” menu, allowing you more options from which to choose. Each of the drop-down menus are also briefly addressed in this chapter.
Additionally with v16 we have added some shortcut buttons on the Main Menu. Log Out: This is exactly as it sounds. Selecting this option will exit the program.
Front Register: This option will take you to what was known as the Work Screen. This will now be referred to as the Front Register.
Main Menu
The main menu includes a Title Bar (top), the Main Menu bar (located below the Title Bar), two shortcut action buttons (located on the main menu), and section that displays your workstation name, and details about the keyblock and install location (also located on the main menu).
The title bar indicates the name of the application, "MicroBiz Plus for Windows." The version number shows next, then the release date of the application. This date is updated whenever a new enhancement or fix is released to public. This will also update the version number to the next highest version in sequence. The bits shown in the parenthesis include, the Workstation Name and Station Identification number.
At the bottom of the main menu you will find a section that displays your workstation name. This can be very helpful for large networks as it quickly identifies the computer name your are viewing on your network.
The small window located underneath this contains the serial number of the keyblock in use, the authorized number of users, and the local executable path for MicroBiz. After this, is the date and time the program was compiled. This date may change whenever we re-compile the program, and is more for official use.
The Main Menu is located below the Title Bar, and there are a variety of options under each menu item.
File Menu
Exit
Click this to exit the program.
Register Menu
Front Register
Use the Front Register for transaction processing. Transaction processing is the process where all billing, payments, and adjustments are made to your system.
Close Out
Use the Close Out feature and select your end-of-day reports (*80-Column). There are many reports that can be run, to reflect what has occurred during your business day.
Today’s Sales
Use this function at any time for a quick view of your sales for the day. Here you can display cash and sales figures since your last closeout, as well as print the sales figures.
Reprint Old Invoice
Used to generate additional copies of previous invoices. This is sometimes necessary when original hard copies of invoices are lost. Fun Fact: If you change your invoice type, and reprint an invoice with this option, your invoice will print using the new invoice type!
Fill Backorders
This option is used to fill invoiced backorders at the front register. This option can be selected once you have received a positive qty of the product on backorder. *This is different than the purchase order backorders.
E-mail Old Invoice
This feature allows you to generate an e-mail with an old invoice of your choice as an attachment.
Management Menu
Add/Edit Password
Add and edit employee passwords and ID information. This information is required if you are going to be controlling the system with security settings.
Edit Security Level
Allows security levels to be set. This information is required when you want to prohibit use of certain system functions for certain personnel.
Change Own Password
Allows the logged-in user access to edit their own password. Using this feature, lower level personnel cannot change their own security level.
Employee Management
Includes employee information: name and address plus activity reports, commission settings and reports, time clock entries, etc.
Custom System Settings
Customization is an important factor in allowing the system to manage your business properly. The following areas must be reviewed and established to maximize the proper use of your MicroBiz system.
Print Output Settings ( Formally Print Settings )
- Transaction Settings
- Hardware and Printer Settings ( Formally Hardware Settings )
- Store Address Settings ( Formally Shop Name Ship-to-Data )
- Credit/Debit Card Settings
- Global Store Settings ( Formally Global Settings )
- Business Type Settings ( Formally Business Settings )
- File Data Path Settings ( Formally Windows Settings )
 For detailed information on customizing your software for your business, see Chapter 3.
Physical Inventory (MicroTrak)
Used in conjunction with portable inventory tracking devices during a physical inventory. Using this feature allows you to insert your physical inventory count and automatically update your inventory records.
Import Data
History Report
Order Shipment Tracking
Allows the user access to the shipping information. It can be sorted in ascending or descending sequence by invoice number.
Use with caution! Call MicroBiz Tech Support before using this function.
Delete Files
Allows for removing all data from system database files. The use of this feature should not be necessary unless you are restarting your system from scratch. You may be asked to backup your system when selecting some of these options.
Edit End Of Day Data
This is a tool to assist in modifying your end-of-day data. This is the window that shows just before printing your Ins/Outs during closeout.
Inventory Menu
The Inventory menu has options to help maintain your inventory on hand, vendors, departments and much more.
Add/Edit Inventory
Input new inventory into your system or modify existing inventory items.
Barcode Printing
Allows for creation of barcode labels for your inventory.
- LabelWorks Program
Eltron Plus 2122/2242/2642 Printer
CAM Stryper 100
Cognitive Blaster Printer
General Bar Code Printer/Games Barcode Printer
NiceLabel Label/Bar Code Printing Program
Purchase Orders
This is used for generating purchase orders (receiving merchandise).
- Create New Purchase Order
Create Reorder List
Order By Vendor
Edit / Receive Purchase Order
Receive Miscellaneous
Purchase History Report
Re-print Last Created P.O.
Re-print Last P.O. Received
Receipt History
For detailed information on this subject, see Chapter 9.
Price Change
Allows global price changes for inventory items by percent.
Vendor Add/Edit
Add new vendors to your system or modify existing vendors.
Department Add/Edit
Allows you to maintain your various store departments. Such as men's, or shoes, or electronics.
Reorder List
Generates a re-order list for those items that meet your normal stock and reorder level criteria.
Promotions
Set up specials or promotions for any inventory item.
Bin Labels
Create labels for your storage bins or “shelf tags.” These labels do not include barcodes and can be printed with your report printer using Avery Labels.
Manage Product Attributes
Allows you to maintain standard codes for product colors, sizes and styles. If you have this added to your products because of on import you can refresh values from inventory to automatically build these tables.
Color Add/Edit
Size Add/Edit
Style Add/Edit
Refresh Values from Inventory
Reports Menu
MicroBiz helps your business to grow by supplying you with valuable information needed to make better business decisions. Reports are available in a wide variety of ready-to-print formats. Also with the new v16, reports can now be exported to Excel, Word and PDF.
The following is a brief explanation of each of the Reports Menu and submenus. See Chapter 12 for more details and sample reports.
Inventory Reports
Inventory Items
Classic Inventory reports covering reports by SKU, Department, Vendor, and more.
Inventory Valuation
This report gives you data on what you have in inventory and how much it is worth. This can be customized for certain dates and/or items, and displays changes in quantity over a period of time.
Serialized Reports
Reports for serialized inventory items.
Last Active
View items that have not been sold or ordered from a certain date.
Vendor Target Inventory
The Vendor – Target Inventory feature helps you generate reports with details on your current and desired inventory by vendor. These reports help relate information about inventory turnaround and what levels of items you would like to keep on hand to your vendors.
Product Reports
Product Movement
This report shows purchase orders and compares them to your on hand stock levels for items based on the date range entered. It can be customized to find items in different ways, and can give purchase order details and/or a summary of quantity and cost of products received.
Product Turnover
Similar to the Product Movement Report, the Product Turnover report also helps you watch how certain products are doing by reporting stock levels, amounts received and sold, etc.
Vendor List
Displays a printable list of all vendors in your MicroBiz system.
Assembled/Unassembled
This report shows all committed items that may require assembly. The “may require assembly” feature is only available in the Bike Module.
Rentals – Serialized
View all outstanding rental items that have a serial number. For non-serialized rentals, just type rentals at the Front Register.
Maintenance Due
For rental items, this report lets you know what are due for maintenance.
Sales
Sales
Classic Sales Reports Including Sales by Employee, Department, Vendor, and more.
Invoice in Progress (IIP's)
Get information on any outstanding Invoices in Progress by selecting a date range (report is based on date IIP was saved).
Cost of Goods Display
A simple report that displays the total number of units, the total cost and total retail value of all items in your inventory. Note that this is one big sum of everything and not itemized.
Fast and Slow Moving Products
A fine-tuned report for finding out what products in your MicroBiz system have or have not sold very well.
Layaway List
Displays a list of all customers with outstanding Layaway's and details on each Layaway. You can print reports from here based on this data.
Backorders
Allows you to generate and print reports on any backordered items.
Sales Graphs
Choose one of the presets or “New Sales Graphs” to browse through these graph presentations of your sales.
Customer Reports
Customer List
The customer list is a report based on all of your saved customers. This can be printed and exported to Excel, Word ( Mail Merge ) and PDF.
Mailing Labels
This feature has many options so you can generate a list of all or certain customers and print mailing labels in a variety of ways.
Best Customers
Get a list of your best customers by searching for a certain percentile or number of customers based on sales for a certain period.
Worst Customers
See who hasn’t purchased anything within a specified number of months.
Sales/Marketing Source
If you keep track of the “How Heard” data for customers, then this is how you gather view all of that useful information.
Tax Reports
Quick reports to assist you in your sales tax filing. These reports include:
Tax Exempt
Tax (by) Area
Work Order Reports
Service Due
For users of the Service Module only! Any customers that have a “Next Service” within the date range specified will be in this report, along with some of their details and the service name that is due.
Technicians’ Hours
For users that track services and/or service hours. For a given date range, view all technicians that have recorded services along with the specific Invoice number, SKU, hours, revenue generated, etc.
Customers Menu
Allows creation and maintenance of your customer database. Here you can also get statements and balance due reports. You can even create postcards for special mailings of promotions to your customers.
Add/Edit Customers
Clicking this will produce a list of all customers currently saved in MicroBiz. From here, you can get a add customers, edit their information, get customer history reports, etc.
Customer Statement
This takes you directly to the Customer Statement window where you can generate a report on any or all customer accounts.
Balance Due
The Balance Due Reports give you info on any outstanding balances or credits and lets you generate customer statements.
Ship to Addresses
To be enabled in the future
How Heard Codes Add/Edit
This is the “How Heard Maintenance” screen, where you can manage your categories for recording and keeping track of how customers found your business.
Service Due Postcards
You can print postcards for all customers or those with “service due” from this area.
Tools Menu
Within the Tools menu, there are several features that are used to import or export data from MicroBiz. We also use the tools to clean and pack the MicroBiz databases. This clean and pack should be done twice a month on a minimum level.
Query Records
Select specific data to create customized exports or reports.
Data Dictionary
Query Manager
Rebuild Index Files
See Chapter 13 for more details about this feature.
Update Item Records via CSV File
This feature allows you to import a list of products into MicroBiz regardless if they are already there or not. If importing an item where the SKU exists, the information behind that record is what is updated in the database. If the item does not exist via that SKU, then a new record is created.
Reindex/Clean and Pack, etc.
Cleaning and packing will ensure that the system functions properly at all levels. Use these functions to improve system performance.
Customers
Product
History
Miscellaneous
All Files Above
Recalc Customer Buckets
Recalc Customer Balance Due
Recalc Customer Credit Balances
Recalc Product Buckets
Recalc Product Backorder Quantities
Duplicate Files Check
A utility to be used periodically for proper file control. Each of your data files should only be in one folder at a time. Any duplication can cause improper data control.
Scan For Corrupt Files
A utility to alert you to corrupt data files. An important feature to be used periodically to ensure data accuracy.
Other Tools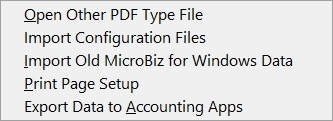
Open Other PDF Type File
While using MicroBiz you may want to open a PDF file but not exit MicroBiz. Simply select this option and find the PDF file to open.
Import Configuration Files
Configuration files can be found within an old BizWin folder. If you have your old BizWin intact you can use this old folder to update the configuration files within the current installation of MicroBiz. The configuration files, contain data that control how MicroBiz will function. These correspond to your custom transaction settings.
Import Old MicroBiz for Windows Data
Import v1 - v8 of MicroBiz Data into the current blank version currently installed. This will all Customer, Products, End of Day Data, and Charge to Account Balances. Please note that charge to account balances are summed up into a single open file transaction for any open balances when carried over. No itemized information will be included, just a carry forward balance and invoice number to associate this balance with. If you are using v9 or better, you can simply install MicroBiz on top of your existing data.
Print Page Setup
This is the Windows Page Setup dialog box that allows you to set your portrait or landscape printing preferences. This is mostly unused as this is capable of being setup directly within the windows printers settings.
Export Data to Accounting Apps
Allows you to export end-of-day data to specific accounting packages.
- Be sure to setup your Quickbooks Accounts before exporting.
- Export Vendor Invoices to Quickbooks A/P as well as Closeout Data
*Allows you to create an .IIF file for a specified date range that is imported manually to Quickbooks.
Help Menu
Help is always available here!
User Manual
Provides a shortcut to the MicroBiz v16 User Manual. This can also be opened from the Main Menu or Front Register by pressing Alt+N.
Remote Desktop Support
Use this option to get technical support a passcode to login to your computer for remote assistance. You must be online for this option to work. *Known compatibility issues when running TightVNC already prior to using this option.
About This Program
Opens the “about” window, found in most applications. This shows the current version and build dates of the application, also found in the title bar and on the main menu combined.
License Agreement
Selecting this button displays the disclaimer for MicroBiz users.
MicroBiz Training Video
The MicroBiz Training Video is another great resource for learning to use the MicroBiz system! Choose this option to launch the video program where you can select a topic, and get helpful advice on how to use a feature.
Activate Training Mode/Sample Data
Use this function for training purposes, not really needed for experienced MicroBiz users. However, this feature is nice when hiring a new employee. Activating Training Mode allows the new hire to play around with the system, learning how to accept a sale, add a customer, add a product etc., without interfering with the live database or other registers!
Activate Active Mode/Live Data
This allows the user to deactivate the training database and go back to their Live data folder.